Building an Ixian DLT Node from source on Windows
Prerequisites
- Operating system: Windows 7 or higher, Recommended Windows 10
- Alternatively: Windows Server 2008 R2 or higher, Recommended Windows Server 2016
- RAM: at least 16 GB
- CPU: i7/i9/Xeon or AMD equivalent processor with at least 2GHz and at least 8 CPU threads
- Free Disk Space: 1.5 TB, 2 TB Recommended
- Internet Connection Speed: 50 Mbps symmetrical or higher, 100 Mbps recommended
Additional requirements
- Visual Studio 2022 (Community Edition is fine), with the following modules:
- .NET Desktop Development Workload
- Desktop Development with C++ Workload
- (recommended) Git
Obtaining the source
The source for Ixian DLT may be downloaded from the Ixian Github page. There are several options available:
- Download the latest sources as a ZIP package (see note below)
- Clone the latest sources using a Git client (see note below)
Note: In order to build the Ixian DLT executable, you will need to obtain the sources for two projects: Ixian-Core and Ixian-DLT. Both projects must be placed together in some folder, as demonstrated on the picture below:
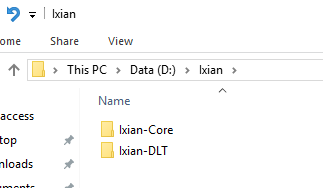
If you are retrieving the sources as ZIP files, they must be unpacked and placed in the same folder. In particular, the following files must be in exactly the right places:
- Ixian-Core/IXICore.shproj
- Ixian-DLT/DLTNode.sln
- Ixian-DLT/IxianDLT/DLTNode.csproj
If you are cloning the git repository, accept the default path recommendations and choose the same parent folder for both projects to ensure they are correctly placed.
Note: The parent folder name is not important.
Opening the Visual Studio Solution
Open the source folder Ixian-DLT and double click on the solution file DLTNode.sln. The solution will load in Visual Studio.
Note: If there are problems with the IXICore project, the Ixian-Core was not found in the proper place, or the folder name is incorrect. Sometimes, extracting the ZIP archive creates additional, unneccessary subfolders. Simply move the source files to where they should be and re-open the solution.
Building the project
-
In the Visual Studio window
Solution Explorer, right-click the projectDLTNodeand choose “Rebuild”.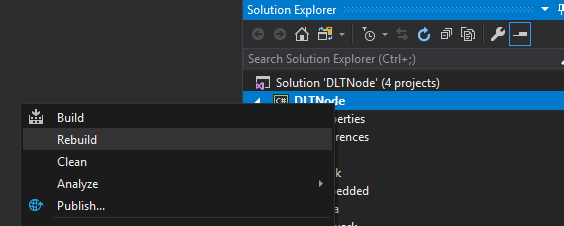
-
Choose the Solution Configuration as either
DebugorRelease. The former allows stepping through code and inspecting variables if executed from Visual Studio, but at the cost of significantly worse performance. The Release build is meant for the final product which should run as fast as possible.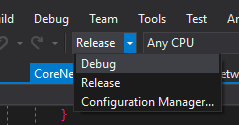
-
When the rebuild has finished, right-click the project
Argon2_Cand choose “Rebuild” -
(optional) If the Output Window is not enabled, click on View -> Output to see the results of each build.
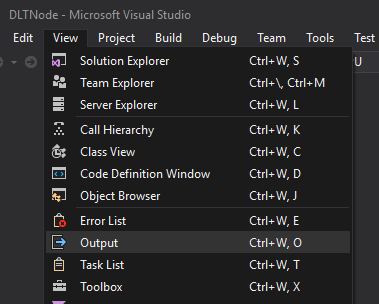
-
Each rebuild should finish with the status “Rebuild All Succeeded” in the status bar and in the Output Window. Some warnings are expected, but if you encounter errors at this point please open an issue on the GitHub page and attach the contents of your output window as a text file, so we can find out what went wrong.
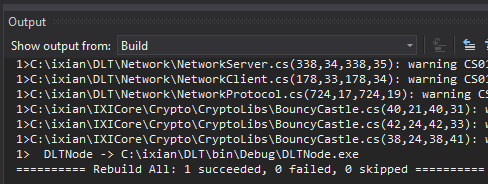
-
The DLT program can be found in the bin\Debug or bin\Release folder under the project
Ixian-DLT. It will be namedIxianDLT.exe. The Debug folder is used for Debug-Configuration builds and the Release folder is used for Release-Configuration builds.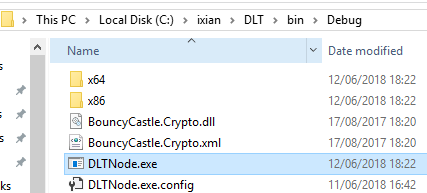
-
(optional) You can copy the binaries (contents of the
DebugorReleasefolder to any folder on your system, but make sure to include all the files which were generated in the bin\Debug or bin\Release folder. Alternatively, you can start the DLT Node from the Debug or Release folders.
