
Note: This guide should work for most apt-based distributions, such as:
- Ubuntu, recent versions
- Debian, recent versions
- Devuan
- Kali Linux
- MX Linux
- Mint
IxianS2 was tested on Ubuntu (22.04+).
Installing an Ixian S2 Node on Linux (Debian/Ubuntu clones)
Prerequisites
- Operating system: apt-based Linux distribution, such as Debian or Ubuntu
- RAM: 4 GB
- CPU: i3/i5/i7/Xeon or AMD equivalent with at least 2 GHz
- Free Disk Space: 10 GB, 20 GB Recommended
- Internet Connection Speed: 10 Mbps symmetrical or higher, 100 Mbps recommended
Additional requirements
- Ability to forward a port from the public internet to the machine running the S2 Node. (Default port is TCP 10235.)
Make sure you have the latest package repositories
Before beginning Ixian installation, it is recommended to update your package manager to the latest package database. On Ubuntu-based systems this is done with the following command:
sudo apt update
Install required software
-
Install the dotnet 8.0 SDK following the guide for your Linux distribution here: DotNet Installation Guide.
- Install additional required packages:
sudo apt install gcc git make unzip - Prepare a directory for the Ixian Project:
mkdir ~/Ixian cd ~/Ixian - Acquire the latest Ixian sources from github. Two repositories are required to build an S2 Relay node:
git clone -b master https://github.com/ProjectIxian/Ixian-Core.git
git clone -b master https://github.com/ProjectIxian/Ixian-S2.git
The directory structure should look like this:
. .. Ixian-Core Ixian-S2 - Switch into the
Ixian-S2directory and download the required NuGet packages:cd Ixian-S2 sh rebuild.sh
The script will build all necessary files, which will be located in ‘~/Ixian/Ixian-S2/IxianS2/bin/Release/net8.0/’
- Switch to the Ixian binaries folder:
cd ~/Ixian/Ixian-S2/IxianS2/bin/Release/net8.0/
The Ixian S2 node is now ready to start.
Running the software
Switch to the Ixian S2 binaries folder and issue the command to start the IxianS2 software:
./IxianS2
If you’re on a console-only environment with no GUI, issue this command instead:
./IxianS2 --disableWebStart
Alternatively you can also start the Ixian DLT with this command:
dotnet IxianS2.dll --disableWebStart
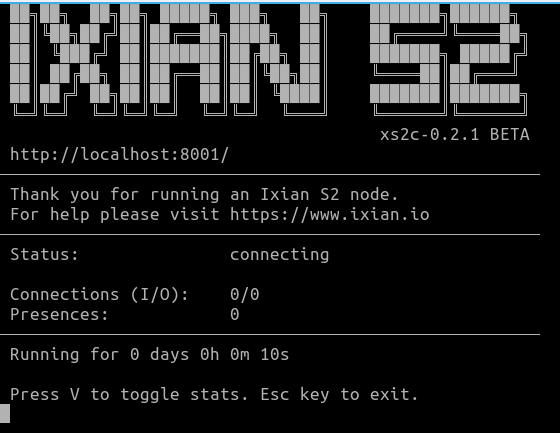
The output should look like this:
Creating a wallet
If this is the first time that you’re starting Ixian S2, a new wallet will be generated for you. You have to set your new wallet’s password to proceed. This password will be used to encrypt the ixian.wal wallet file and will be required every time you start the Ixian S2 node. The file is encrypted using AES256.
It is recommended to periodically copy the wallet to a safe location, preferably on an offline media (USB Key), or a different machine. The wallet file is called ixian.wal.
Verifying the status of the S2 Node
While the node is running, it will display a logo and some basic information in the command window. Please do not close this window, as closing it will cause the S2 Node to shut down.
When the Ixian S2 Node first starts, the status text will display connecting while the software is retrieving the required information from the Ixian DLT network. When this process has been completed, the status text will change to active.
Changing the settings
There are several ways in which Ixian software can be configured:
Configuration on the command line
Ixian S2 Node settings can be provided on the command line when starting the IxianS2 executable. The most important parameters are:
- -p S2 Port: If you are for some reason unable to port-forward the default port, 10235, you may use a different port. The
-pswitch will change which port the software uses for S2 communication. - -i External IP address: The IxianS2 software will use UPnP to try and determine the external IP address of your node. If this fails for some reason, you can specify the external address using the
-ioption. - -a API Port: This changes the port on which the node accepts Rest API commands.
- –help: Displays a short help with some other, less frequently used command options.
Configuration file
An alternative to specifying parameters on the command line is the Ixian S2 configuration file, which can be used to configure the most important settings.
The format of the file is simple INI (without sections):
- Each option is specified on its own line
- Option syntax is
option_name = option_value - Whitespace is not important
- Lines starting with
;are ignored - Option names are case-sensitive
A list of options supported by the config file is:
| Option name | Type | Repeatable | Default | Description |
|---|---|---|---|---|
| s2Port | int | No | 10235 | TCP port number for the S2 Node, when running on the main network. |
| testnetS2Port | int | No | 11235 | TCP port number for the S2 Node, when running on the test network. |
| apiPort | int | No | 8001 | Port for the internal REST API server to listen for commands. Note: This port is only avilable on the localhost interface (127.0.0.1). |
| testnetApiPort | int | No | 8101 | Port for the internal REST API server when the node is operating on the test network. |
| addApiUser | Username:Password | Yes | EMPTY | An additional layer of protection - will require all REST API calls to include the given username and password. |
| externalIp | IP Address | No | EMPTY | Configure this if the external IP address cannot be automatically determined via UPnP. |
| addPeer | Hostname or IP Address | Yes | Seed Nodes | Set this to use different Ixian DLT Mater nodes as seed - this option only has an effect in mainnet mode. |
| addTestnetPeer | Hostname or IP Address | Yes | Seed Nodes | Set this to use different Ixian DLT Mater nodes as seed - this option only has an effect in testnet mode. |
| maxLogSize | int | No | 50 | Size of the Ixian S2 log file (in megabytes), before it is automatically rotated. |
| maxLogCount | int | No | 10 | Number of old (full) log files to keep before deleting the oldest. |
| walletNotify | string | No | EMPTY | OS command to run whenever the local wallet is updated. |
Any repeatable options may be specified more than once. If nonrepeatable options are specified multiple times, the last one is used.
Startup script
If you need to run the S2 Node with different settings, but are unable to use the configuration file, it can be tedious to type them out every time you wish to start the software. It is recommended to create a shell script (.sh) with the options already set. To do this, follow the guide below:
- Switch to the Ixian S2 Release folder. If you have followed the above instructions for building, the command should be
cd ~/Ixian/Ixian-S2/IxianS2/bin/Release/net8.0/. - Create a new script using your preferred text editor. This example uses nano:
nano StartIxianS2.sh. - Type or paste the IxianS2 command into the file. You may use the command below, which includes the most common options, as the starting point.
./IxianS2 -p 10235 -a 8001 -i 172.16.34.17 - Save the file and quit the editor. For nano, the command is
Ctrl-X, thenY. - Make the script file executable:
chmod u+x StartIxianS2.sh. - Use the new “StartIxian.sh” file to start the S2 Node with the specified options
./StartIxianS2.sh.
Upgrading the S2 Node software
When a new version is released, you can upgrade the software using the following checklist:
Note: It is recommended to backup the wallet file ixian.wal before performing any upgrade or changing any settings on the command line.
Note: We assume that you have followed the above instructions and the Ixian directory names are as follows: | Directory | Path | | — | — | | Ixian-Core | ~/Ixian/Ixian-Core | | Ixian-S2 | ~/Ixian/Ixian-S2 | | Executable | ~/Ixian/Ixian-S2/IxianS2/bin/Release |
If you have placed the Ixian source code folders elsewhere, change them in the below description. Furthermore, if you copied the executable files from the bin/Release folder someplace else, you will need to repeat the copy step to overwrite old executable files with new ones.
- Save the ixian wallet file:
cp ~/Ixian/Ixian-S2/IxianS2/bin/Release/ixian.wal ~/ixian.wal.backup. - Shutdown the Ixian S2 Node.
- Switch to the Ixian-Core directory:
cd ~/Ixian/Ixian-Core. - Update the sources to the latest version:
git pull. - Switch to the Ixian-S2 directory:
cd ~/Ixian/Ixian-S2. - Update the sources to the latest version:
git pull. - Run the rebuild script:
sh rebuild.sh. - (Optional) If you have copied the binaries elsewhere, repeat that step.
- Start the Ixian S2 Node again. The node will use the existing wallet file, so it will not need to generate a new wallet.